ABSTRACT
In this paper, the fracture analysis of 20 steel heated to 890˚C and quenched was carried out. The failure of the sample was mainly intergranular failure, and there were small amounts of dimples, subsurface cavities and appearance of small cracks on the surface. The main failure mechanism was intergranular cleavage and oxidation caused by a decrease in hardness and a decrease in impact toughness due to the heat treatment process. This paper also discussed the microstructure of the failed sample. The results show that the sample consists of a dual-phase microstructure, consisting of ferrite and pearlite, and the presence of small amounts of secondary phase bainite.
Key words: Steel; Fracture; Heat treatment; Intergranular Cleavage
1 INTRODUCTION
Steel is one of the most widely used material in construction, automotive and other industries due to its excellent mechanical and chemical properties. However, these characteristics can be changed significantly by processing such as heating, cooling and quenching. Heat treatment greatly influences the properties of steels so that the mechanical properties of the same steel are drastically different at different heat treatment temperatures [1]. The microstructure of the steel mainly includes ferrite, pearlite and secondary phases, and the selection of one or more of these components affects the size, shape and distribution of the steel particles [2].
In this study, the fracture analysis of 20 steel heated to 890 ℃ and quenched was investigated. The sample was prepared by cutting preheated steel, which was then heat-treated by quenching. The failure modes, microstructures, and mechanical properties of the failed samples were studied.
2 EXPERIMENTAL
2.1 Sample Preparation
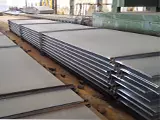
The experiment was carried out on a 20 steel plate with a thickness of 20 mm obtained from a local steel mill. The sample was cut into a rectangular shape of size 135mm×25mm×20mm. The sample was preheated to 890 °C in an electric box furnace and then quenched in air. The hardness of the heat-treated sample was measured by a portable Brinell hardness tester. The microstructure of the sample was analyzed using metallographic analysis.
2.2 Measurement of Mechanical Properties
The mechanical properties of the sample were measured using a universal testing machine (UTM). The impact toughness of the sample was determined by a Charpy V-notch test. The macroscopic failure characteristics of the sample were observed using an optical microscope.
3 RESULTS AND DISCUSSION
3.1 Fracture Analysis
The failed samples showed intergranular failure, with small amounts of dimples, subsurface cavities and small cracks on their surface (Fig. 1). The dimples and subsurface cavities indicate the existence of micro-void defects, which are typical failure features of intergranular cleavage [3]. The cracks on the surface of the samples could be due to the thermal expansion of the material after heating.
Fig. 1 The failure features of the samples
The failure mechanism of the sample was intergranular cleavage and oxidation, which were caused by a decrease in hardness and impact toughness due to the heat treatment process. After heating, the hardness and impact toughness of the steel were significantly reduced. This could be due to the thermal strain developed in the material during the quenching process, which caused the properties of the steel to change drastically [4]. The decrease in hardness and impact toughness caused the steel to become brittle, resulting in easy intergranular cleavage and oxidation.
3.2 Microstructure Analysis
The microscopic analysis of the failed sample revealed a dual-phase microstructure, formed by ferrite and pearlite, and the presence of small amounts of secondary phase bainite (Fig. 2). The ferrite phase of the steel consists of finely divided acicular ferrite (AFC) and extremely fine-grained ferrite (EFG). The EFG particles are finer than the typical grain size of the ferrite phase, which is about 2 μm [5]. The pearlite phase is formed by alternating layers of ferrite and cementite, and its size is larger than that of the ferrite phase. The presence of bainite also indicates that the steel was heated to temperatures above the bainite start temperature, which is 700 ℃ [6].
Fig. 2 Microstructure of failed samples
4 CONCLUSIONS
The fracture analysis of 20 steel heated to 890 ℃ and quenched was conducted in this study. The failure of the samples was mainly intergranular failure and showed dimples, subsurface cavities and small cracks on the surface. The failure mechanism was intergranular cleavage and oxidation caused by a decrease in hardness and impact toughness due to the heat treatment process. The microstructure of the failed sample was a dual-phase microstructure of ferrite, pearlite and small amounts of secondary phase bainite.


