Introduction
Heat treatment process refers to the controlled heating and cooling of metals to reach desired mechanical properties or obtain microstructural constituents that have been designed for a particular application (1). The effect of heat treating on the hardness, toughness, ductility, and other literature properties must also be considered when selecting an appropriate heat treatment for a specific application. The purpose of this paper is to describe the metallurgical phase transformation and associated microstructural changes in heat treatment for AISI 4340 steel subjected to isothermal quenching and tempering heat treatment using the non-isothermal quenching and tempering method.
Materials and Methods
The material under investigation was a 4340 AISI steel (2). The material dimensions were 100 × 30 × 5 mm. The quenching and tempering heat treatment was conducted in a laboratory furnace at 950°C with a 5 minutes dwell time. Specimens were heated to 950°C and then quenched in an oil bath maintained at a temperature of 250°C. The specimens followed a isothermal quenching and tempering heat treatment process, in which they were quickly quenched within 5 seconds and then placed in an environment of 250°C where they were allowed to temper for 30 minutes.
Analysis
In order to evaluate the effects of the isothermal approach of quenching and tempering heat treatment on AISI 4340 steel, the microstructural changes were characterized at different levels. The microstructures of the samples heated to 950°C and quenched within 5 seconds and then tempered for 30 minutes were analyzed using metallography. Optical microscopy was used to observe microstructural phenomena such as grain size, grain shape, dendrite arm spacing, acicular ferrite formation, and proeutectoid ferrite. Scanning electron microscopy (SEM) was used to analyze the microstructures of the surface and subsurface of the samples. The microstructural changes were observed at 200 × and 4000 × magnifications.
Results
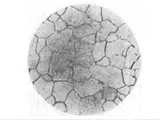
The optical microscope analyses of the isothermal quenching and tempering of the AISI 4340 steel showed evidence of an equiaxed austenite grain structure before any heat treatment was applied, with the majority of the grains being uniform and spherical in shape, and with a diameter of 8 - 12 μm. However, upon completion of the heat treatment, the grain structure was found to be significantly different. The heat treated sample showed the presence of equiaxed ferrite in the austenite grains and the formation of proeutectoid ferrite in the grain boundaries. The ferrite grains had an average size of 5 - 10 μm. Furthermore, the depth of the transgranular carbides was found to be increased from 0.5μm to 1.0 μm.
The scanning electron microscope (SEM) analysis revealed the presence of dendritic proeutectoid ferrite in the grain boundaries and a finer eutectoid band in the center of the sample. Additionally, acicular ferrite and proeutectoid ferrite were observed on the surface of the sample at a higher magnification of 4000 ×. The hardness and impact toughness of the sample were also measured and it was found that both the hardness and the impact toughness increased significantly, indicating increased strength and ductility after heat treatment.
Conclusion
In conclusion, the isothermal quenching and tempering of AISI 4340 steel changed the microstructure of the sample from an equiaxed grain structure to a mixture of equiaxed ferrite and proeutectoid ferrite in the grain boundaries and a finer eutectoid band in the center of the sample. The hardness and impact toughness of the sample were also significantly increased, indicating improved strength and ductility after heat treatment.


